|
Updates
25th Marth, 2006
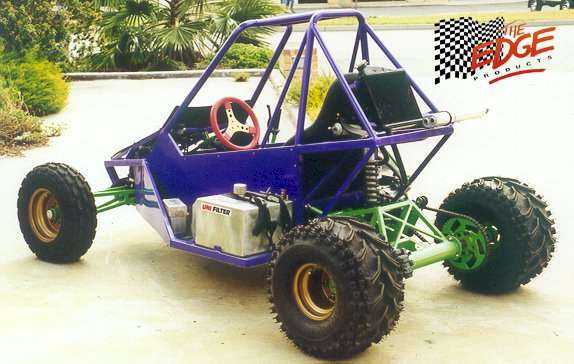
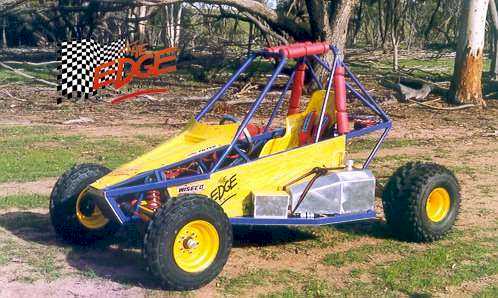
Finally took the buggy out for its first test runs. Went pretty well i reckon. Pics
and some info in the testing page.
1st March, 2005
Well i have been doing little odds and ends over the past month just to finish up the
main parts of the buggy. All of the welding is now completed (except for spotlight brackets at later date). I am now putting
the buggy together. Over the past month i have put the axle together on the swingarm which included installing the keysteel
and drive hubs, brake disk, sprocket, caliper, axle bearings and flanges. And the rear swingarm with axle fitted is now mounted
to the buggy and shouldnt need to be removed again until after my test runs are complete and painting takes place. I also
made up the chain tensioner as per the Edge's plans, so now the chain is installed as well, and i also brought a 14 tooth
drive sprocket to fit on the engine output to get the right gear ratio (14-50 tooth on axle). Harness mounts are all welded
on. And front swingarms are all together now and installed on the buggy with shocks and wheel hubs installed ready to attach
the wheels when i get tires fitted in the next 2-3 weeks. The steering is also installed and ready to go. I am now basically
just waiting on getting my ordering tires and getting them installed on the wheels which i recently painted chrome, still
have to suss out the wiring harness for the engine as i did have the motor running using the harness from the bike, but
then i cut off the ignition barrel to lengthen the wiring so it can be attached to the dash and now the buggy will turn over
with the starter but it wont actually get a spark (currently being looked at by electrician). Also to finish it off i need
to rejet the engine (im using a pod filter instead of standard airbox), get exhaust modified, make accelerator cable up and
install a floor pan. Im predicting about 1 months work ahead of me till its ready for a test run. Pictures of various parts
and assemblys have been added to the brake page, steering page, rear axle page, rear swingarm page, front swingarms page,
and motor page.
27th January, 2005
Today i set up the gear change lever and got it all working sweet. The gear lever is
in a different position to the plans because i couldnt get a good straight strong link between the gear change lever
and the engine gear lever by mounting the lever in the position as per the plans. I actually like my position better, its
more comfortable to change gears. Pictures in motor setup page. I also made a peice of aluminium plate up to mount to the
frame behind the seat to mount the relays, cdi, regulator/rectifier, e.t.c on. Picture in motor setup page.
25th - 26th January, 2005
Spent the last two days fabricating up a frame for the radiator to mount onto, and
installed and routed the radiator hoses from one side of the buggy to the other. Once the radiator was installed i was able
to start the engine just using the original bike wiring loom unmodified, sitting on a stand next to the mounted engine, and
using a bottle filled with fuel above the engine to gravity feed the carby till the proper setup is completed. The
engine started first turn which was very nice to see. I still need to modify the exhaust and also move the airox as its
in the way at the moment. I also welded up a holder for the battery on the left wing. Pictures of the battery holder and radiator
fitted with hoses routed to engine are in the motor setup page.
18th - 19th January, 2005
Yesterday and today i finished up the pedal boxes, they are now completed which is
now another thing out of the way. Pictures of the setup in the pedal page. I also got my radiator today from the wreckers,
its off a 1975-80 GL1000 Honga Gold Wing, its the perfect size to fit above the fuel tank on the left wing of the winder.
I got it for free as i traded some parts off the KLR650 i pulled apart to take the motor and gave them to him as a trade.
He originally wanted $100.00 for it. Its about twice the size of the original KLR radiator. Picture in the motor setup page.
13th January, 2005
Well i had a big break from doing the buggy over the christmas period but i finally
got back into it today, today i made up the seat rails for the seat to be fitted to. Just made from 30x30 RHS which was recessed
a little into the frame, pretty simple design, pictures in cockpit page.
24th - 28th November, 2004
Fabricated and welded the lower front shock mounts to the swingarms, i also had to
cut off my front upper shock mounts and mount them a bit higher so that the mount holes were at the correct hieght (315mm
above the 30x30 RHS for Edge shocks) pictures in front swingarm page. I also fitted the 20x20 rhs bracing to the rear swingarm
and welded that on too, pictures in the rear swingarm page. I also extended the tie rods on the escort rack to the correct
length, pictures in the steering page.
16th November, 2004
I finally have time to add another update. Since the last update i have been building
the engine mounts and finished them today so now the engine is solidly mounted into the frame. Pictures of the mounted engine
along with the mounts in the motor page.
10th October, 2004
Today i lent my welder to my brother to use for the day so i couldn't weld anything
more to the frame. I decided i would put the frame on the ground and trial fit the motor to see how it fitted after i had
done the frame mod. Stacks of pictures added to the engine page of the motor sitting in position.
7th October, 2004
Havn't had an update in a while as i havn't really done too much work to the buggy
in the past month. I have been too busy with other things. In the past week however i have been building the supports for
my dash and welded them to the frame. I also designed my own steering column support mounts to fit in with the modification
i had to make to fit in my dash. I also welded in my escort rack mount. Check out pics in the steering page. I also brought
a stainless brake line, pedals, gearshift lever and escort rack mount from the edge, pics in the appropriate pages. A VL steering
column (lower section) was also purchased so i can now begin constructing my steering column, it was $30 from a local wreckers.
Picture in steering page.
23-24th August, 2004
I am doing an apprenticeship as an Aircraft Engineer with Qantas and part of my TAFE
course is that i do a composite material course (fibreglass, carbon fibre, kevlar). Part of the course is that we have
to make something from carbon fibre. I thought what better a chance than now for me to make the dashbard for the buggy. So
there you go, i made a carbon fibre dash for the buggy for free even though i used approx $200 in mterials, Sweet. Pics in
cockpit page.
21st August, 2004
Today i measured, cut, drilled and tacked the rear upper shock mounts to the frame.
Check main frame page and rear swingarm page for pics.
18th August, 2004
Today i recieved my shipment from the edge, they included front/rear shocks, rear axle
with keysteel, front/rear wheels, 50 tooth sprocket and chain, brake disk, twin piston brake caliper with sidewinder mount,
hubs to mount sprocket/brake disk to axle, chain tensioner rollers, brake master cylinder and i think thats about it. I have
taken pictures of each item and put them in their appropriate pages. Tyres will
be fitted in the next few weeks, i found a place in Penrith, Sydney who sells the Bearclaws and Frontmax quite cheap.
15th August, 2004
Today i cut the frame at the required angles to add the support peices for when the
frame is dropped. Also today i cut the support peices and tack welded it all together. The frame mod to fit the motor is now
pretty much complete, just needs to be fully welded which i wont be able to do until next w/end now, have a busy
week ahead of work. Pics and progress in the motor page.
14th August, 2004
Today i finished off the inner rail mod which i started yesterday and today i also
cut the outer frame where it will be dropped down to fit in the motor. Check out pics and progress in the motor page.
13th August, 2004
Today i strated to do the mod on the lower frame to be able to fit in the KLR650 motor,
check out progress and pics in the motor page.
12th August, 2004
Today i brought the fuel tank i will use for the buggy. Its a plastic marine outboard
motor tank of 22 litre capacity. Costs $60.00. Pics in motor page.
10th-12th August, 2004
- Started fully welding the frame together, previously it was just tacked.
9th August, 2004
- Today i measured, cut, and drilled the lower shock mounts which fit onto
the rear swingarm. Picture of them added to the rear swingarm page.
4th-5th August, 2004
- Measured, cut, drilled and tack welded the front upper shock mounts to the frame. Check out the picture in the Frame Construction
page.
3rd August, 2004
- Made the big decision today that i would use my tax return money to buy The Edge's front/rear shocks
as well as rear axle, hubs, sprocket, chain, twin piston caliper, tensioner rollers, master cylinder, disk brake and wheels.
Yes i know i went overboard. Once i had the order screen up i just kept adding items. Haha. I thought why not? I have
the money so i might as well use the correct parts and make it a good build! Not saying that you cant do a good build without
them. Parts should arrive in 2-3 weeks.
28th July, 2004
- Today i brought my new mig welder, the old arc welder just wasn't acting as it should, playing up all the time. I bought
i gas/gasless CIGWELD Transmig135 from Bunnings for $694 reduced from sumthin like $800. Dad works for a gas company so he
can get discount wire and gas...sweet.
17th-24th July, 2004
- Spent the whole week dismantling the doner bike and trying to get the bastard of the engine out, eventually it came out
with a bit of cutting. Engine, dash, wiring harness and relay pictures added to Running Gear page.
12th of July, 2004
- Today i added a list of prices i have paid for parts/materials at the stage i am up to at the moment, check it out in
the navigation menu.
11th of July, 2004 (1st entry)
- I have been working on the buggy for a few months now but have just decided to make a site about it
- The main frame (40x40 rhs) is pretty much complete and tacked together awaiting final welding and i am now in the process
of cutting all the smaller bracing (20x20 rhs) to fit on the frame.
- The left and right front swingarms are constructed and tacked together and are just awaiting me to decide which shocks
to use so i can fit the shock mounts and completely weld the swingarms up. (i hope to use the edge's shocks, will just have
to save up for them)
- The main body of the rear swingarm is constructed and fully welded and is just awaiting me to choose my rear shock so
i can fit the shock mount correctly (again i will prob use the edge's shock)
- About 2 weeks ago i purchased a complete and running 1988 KLR650 for $1300 from the trading post to use the engine, instrument
cluster and some other parts on the buggy. The engine seems to run fine at the moment but will prob require a rebuild later
on in the project after everything is up and running.
- I am currently stripping the KLR down as can be seen in the pictures and am selling all the non-essential parts on Ebay
to get money to buy the edge's shocks. Yes thats right i need the money, haha
Stay tuned for more updates!
|